
For a game that almost put Obsidian Entertainment out of business, Neverwinter Nights 2 remains surprisingly healthy. This year is proving to be an especially good one for the fourteen year old game. Many mod creators (myself included) have started to return to the scene. As a result, a wealth of new goodies – weapons, armor, scripts and more- have started to inject new life into the many persistent worlds that remain alive and kicking. In fact, there’s even a new Witcher themed world in the works!
This all makes 2020 not only a good time to be a fan of the game, but also a great time to join the mod community around it. The renewed interest in content development provides a good opportunity for aspiring creators to jump in. Which brings us to today’s topic.
Over the last couple of months, I was contacted by a few players. They were keen to try their hands at making new armor sets, but had no previous experience with modelling or texturing. As I told them at the time, the good news is that everyone starts somewhere, and NWN 2 makes for a great starting point. It certainly was mine! The ‘bad’ news is that working with 3D models can be confusing at the start.
With this in mind; today’s guide is aimed at novice’s who have never so much as looked at a raw 3D model. I will try to explain the nature of a 3D asset and all of it’s parts. Hopefully, this will impart knowledge that will be applicable not just to NWN 2, but to future projects outside of the game as well.
What can change the nature of a Model?
Before we can answer that question, we need to address a more basic question; what -is- a model?
Most readers might be familiar with the idea that a 3D model in games is composed of polygons; geometrical shapes that collectively form the basis of an object you see while playing. That’s a fair summary, but not especially helpful when it comes to figuring out what makes it tick. So, let’s go into a more in-depth (and layman’s terms) explanation.
A three dimensional model in most computer graphics terms is a collection of points, known as vertices. A collection of these points form the endpoints of a shape, which is the aforementioned polygon. A polygon is also referred to as a ‘face’, or a ‘normal’ (not to be confused with ‘Normal Map’, which will be explained later).
GOOD PRACTICE NOTE: When creating a model from scratch, it is advisable to build each “face” as a four-sided polygon. This will result in a model that not only has fewer disruptions under light or animation, but one that is also easier to work with when texturing. Three sided shapes are also fine, and most games will already break down polygons into triangles at run-time.
There are a host of technical implications to be aware of with regards to vertices, but such facts are not important for the purposes of creating a new suit or weapon for NWN 2. What is important to know is that each polygon represents a set of coordinates. Those coordinates in the virtual worlds space. This data is used for several functions, but for today, we’ll only concern ourselves with one of those; the UV Map.
His Dark Materials
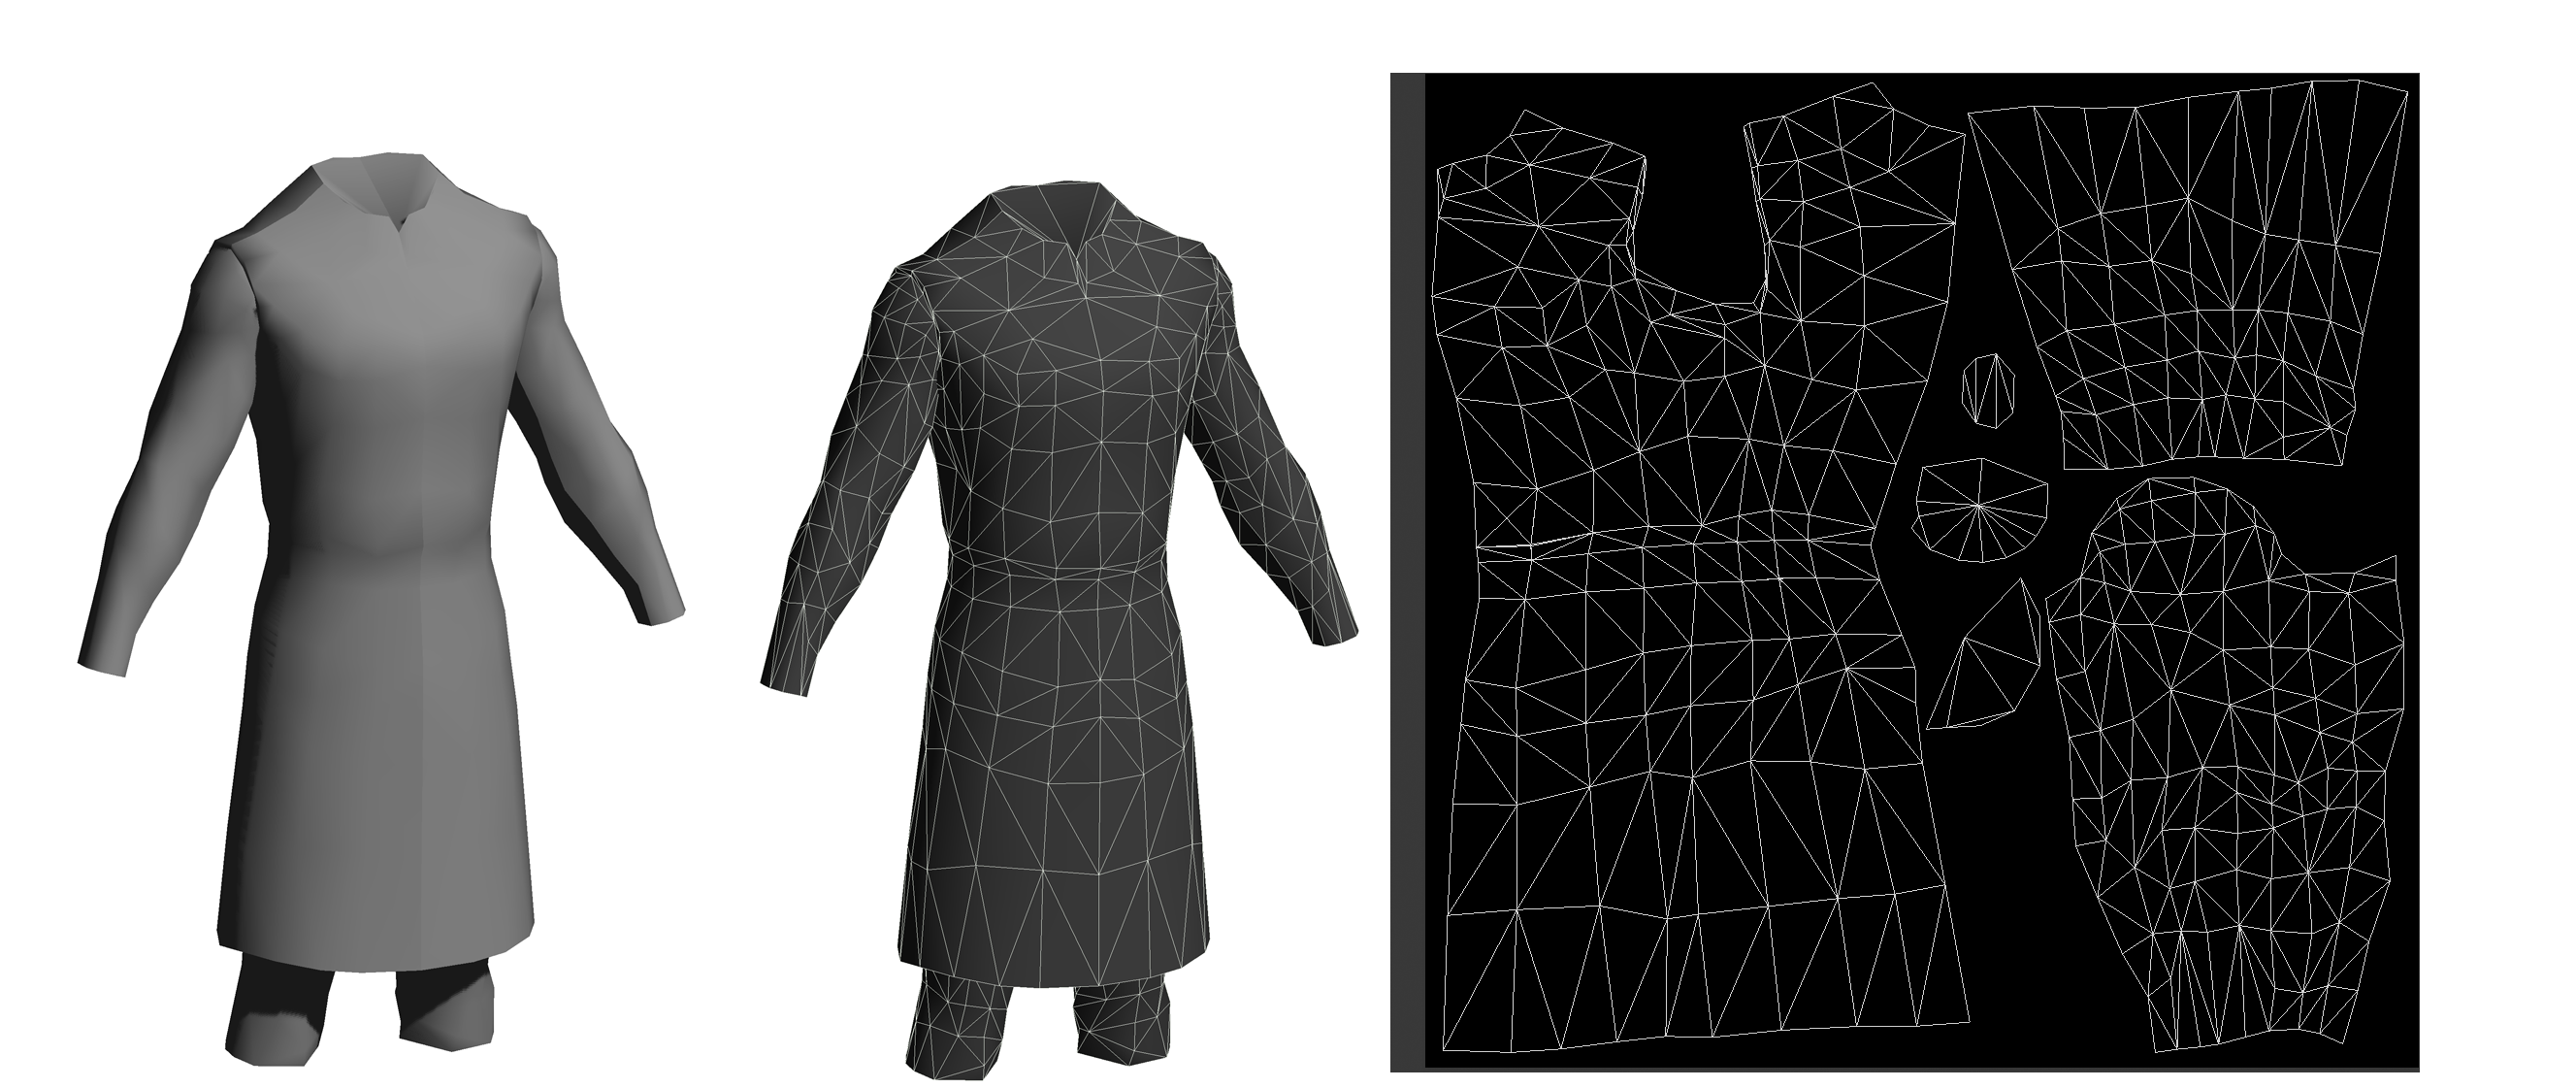
The UV Map, simply put, is a set of coordinates formed out of the polygons. This data is used to determine which shapes of the model are filled with each part of what’s called a Texture.
Texture – or more accurately, the models Material – is akin to the paint job over a colorless model. Especially in older games, it is the primary source of detail. The studs in armor, or the etchings over an ancient sword, are generally from this paint job, and not the geometry. The reason for this is that it takes a bit for a program to constantly redraw all those shapes. To manage this, game artists would only use polygons to form large details, such as overall shape. Minor details, such as the folds between cloths, can be achieved by the ‘paint’ job, which are not being re-calculated by the game as often.
PERSPECTIVE:
Why would a high polygon count be hard for a program to handle? The simple word ‘Frame’ gives a clue. All those vertices that form each polygon are points in space. In a very real way, they are exactly what an artist uses to plan out perspective on a sketch.Each “frame” – that is, each still shot of an image on screen, akin to the frames on a film reel- is redrawn by the program in real time. That means, each and every second of action, the game is re-plotting each and every perspective point, for everything on-screen. As you can imagine, that’s a lot of work!
Note that when I say “more accurately”, I do so because both terms refer to two different things. Material can be thought of as a collection of Textures. Textures, on the other hand, are individual image files that each serve a specific purpose.
The Breakdown: All about the pretty pictures
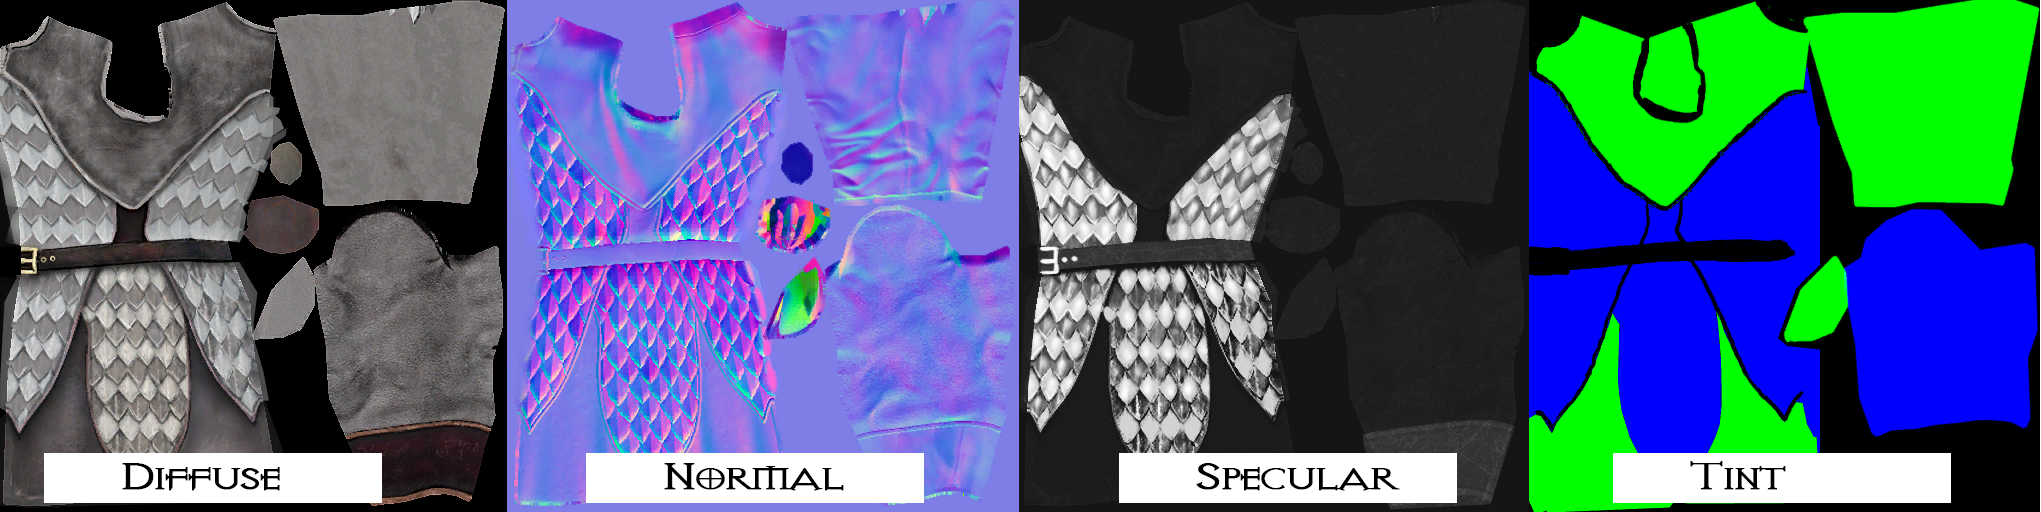
Modern games use a series of image files for a host of complex functions. Neverwinter Nights 2, by contrast, is fairly simple. Each model only requires two files for each model to display correctly, with an additional two optional textures for specific results. The categories and function of each texture in a material for NWN 2 are as follows:
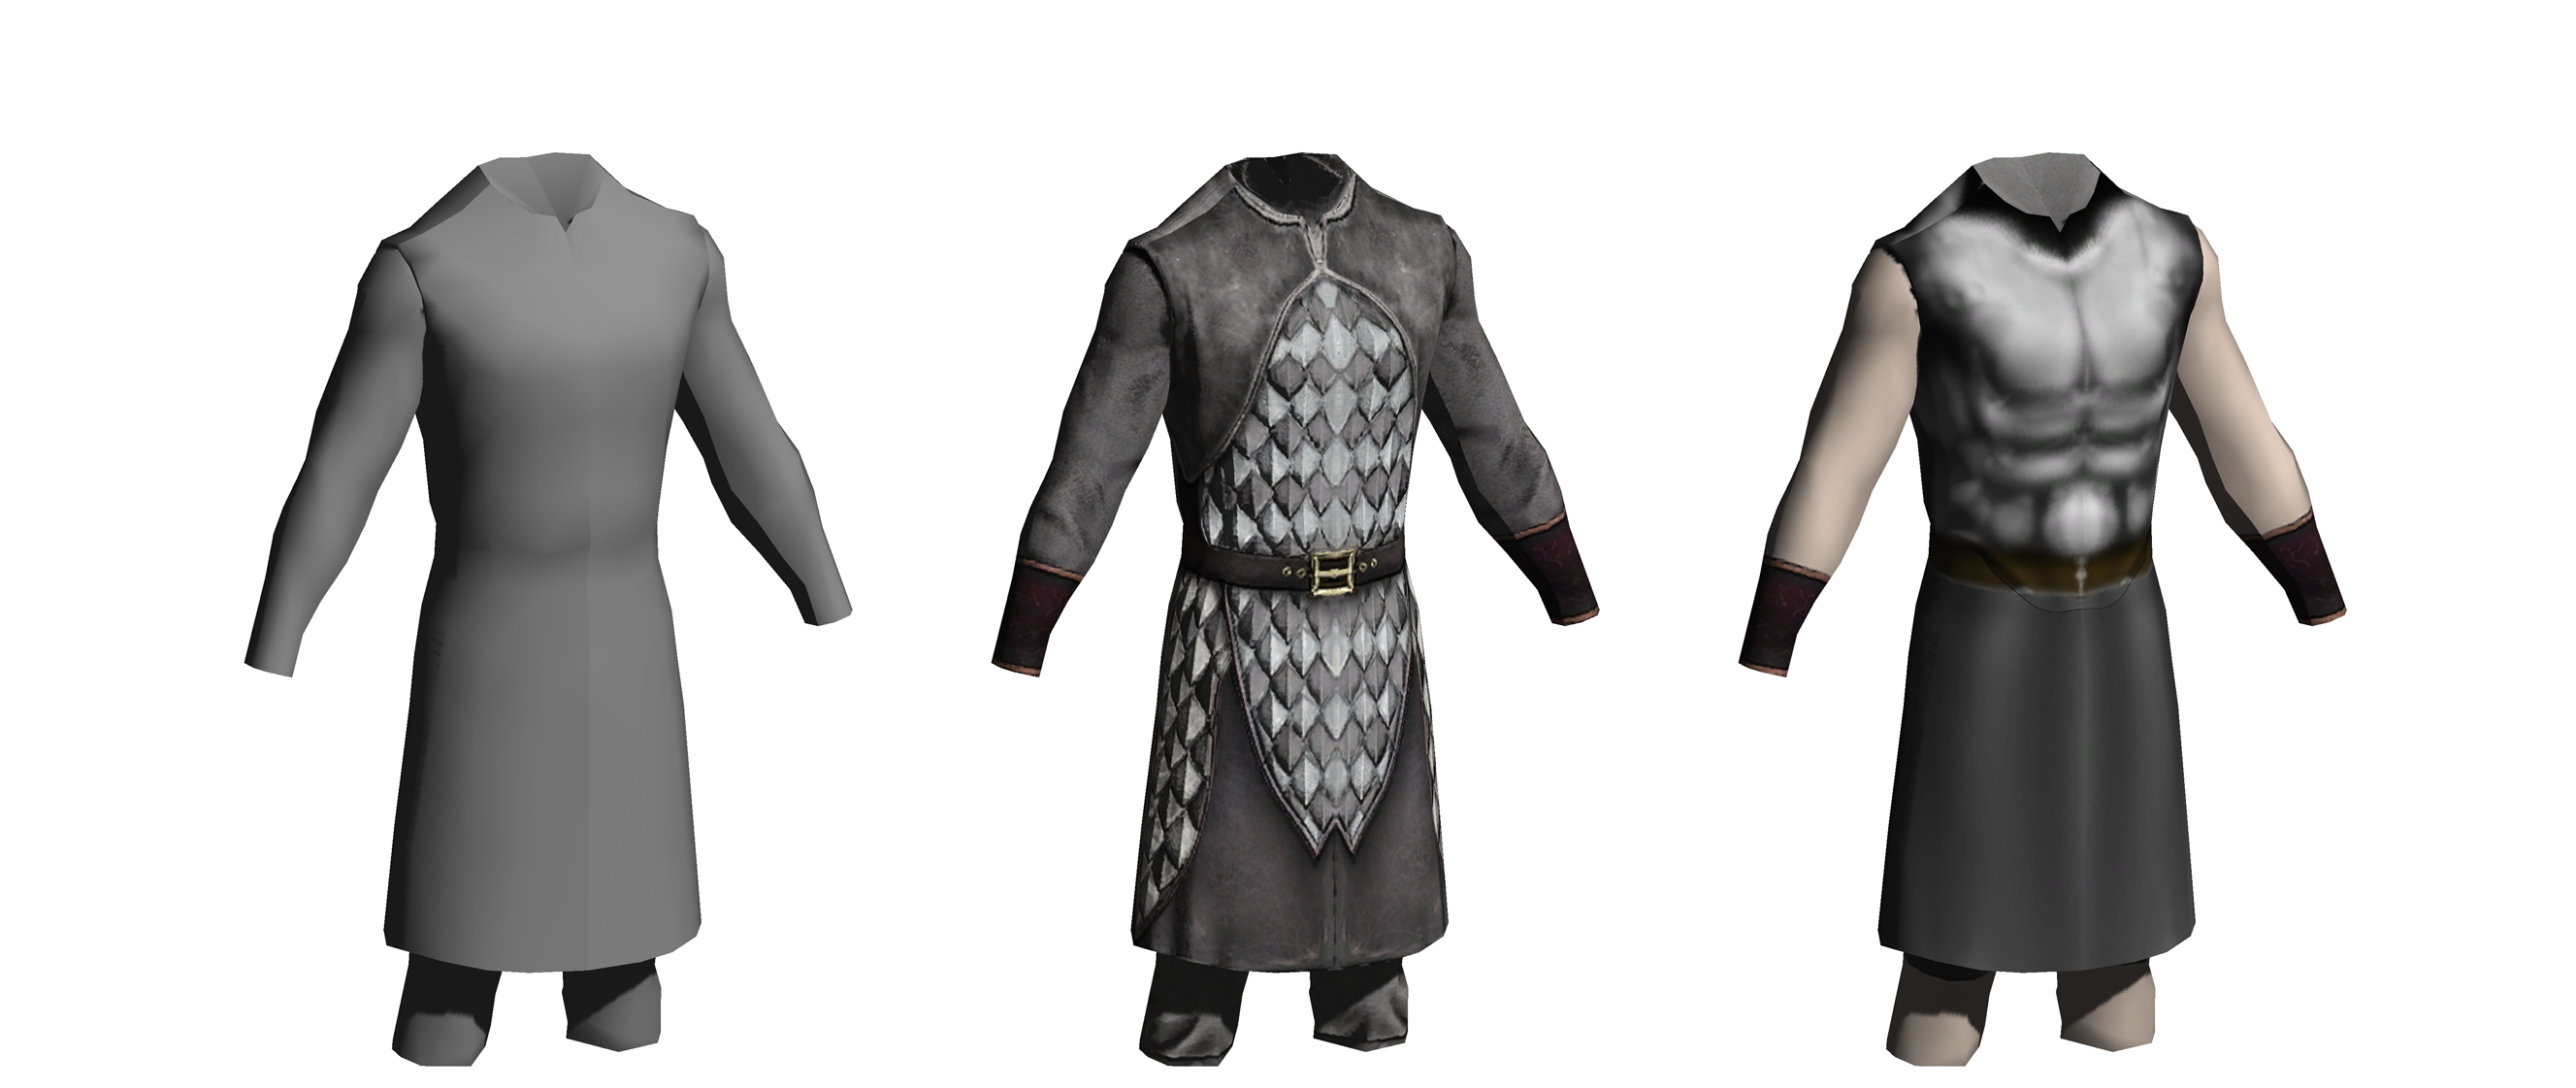
- Diffuse Map: The most basic coat of paint over the model. This texture file contains all the color and drawn details for your model. It may also include ‘fake shadows’, such as those between cloth folds or beneath small embossing work. On its own, the diffuse map is perhaps the most easily recognizable image for what it is. When viewed on a model without any lighting, it may even look more or less finished. However, if a model only has a diffuse map, it will look extremely flat, and not react to light properly.
- Normal Map: This is where the real wizardry starts! The ‘Normal Map’ is a texture file that fakes depth on a model. To the naked eye, it may appear as little more than a blue/ purple hued version of the diffuse. Look closer though. Notice the difference in hues, and how many of the more drawn in details from the diffuse are absent. The variation represents varying height levels. When light shines on the model with the appropriate normal map, the corresponding section will either appear high or low.
- Normal Alpha Channel: Most games would load the image in the alpha channel as a distinct file, known as the Specularity Map. The Specular map controls how shiny or smooth a surface is.
- Tint Map: Determines which part of the texture will be recolored by the games “tint” functions. The tint map is not strictly required, but will make the end result more customization by players.
- Glow Map: Another optional image, this is more of a special effect that makes certain areas glow.
We’ll cover more about the tint and glow maps in part 2 of this guide.
What all of this means is…
In simpler terms; you should consider a 3D model in games (NWN 2 or otherwise) as essentially really complex origami models. Each ‘face’ is an angle of the paper, and the textures are basically drawings made on the whole page. The biggest difference here is that with a paper model, you would probably start with the textures, whereas here, the texture comes after the basic model is prepared.
With that out of the way, let’s get to the fun part…
What you’re working with; concept and model
When you’re just starting out, it will probably be easier to repaint an existing model, rather than make one from scratch. This will help you better understand how each asset works, by forcing you to study how they are setup, and figuring out how tweaking one part or the other alters the end result.
In my case, I first started by trying to create an ‘Elven’ armor set, back in 2009.
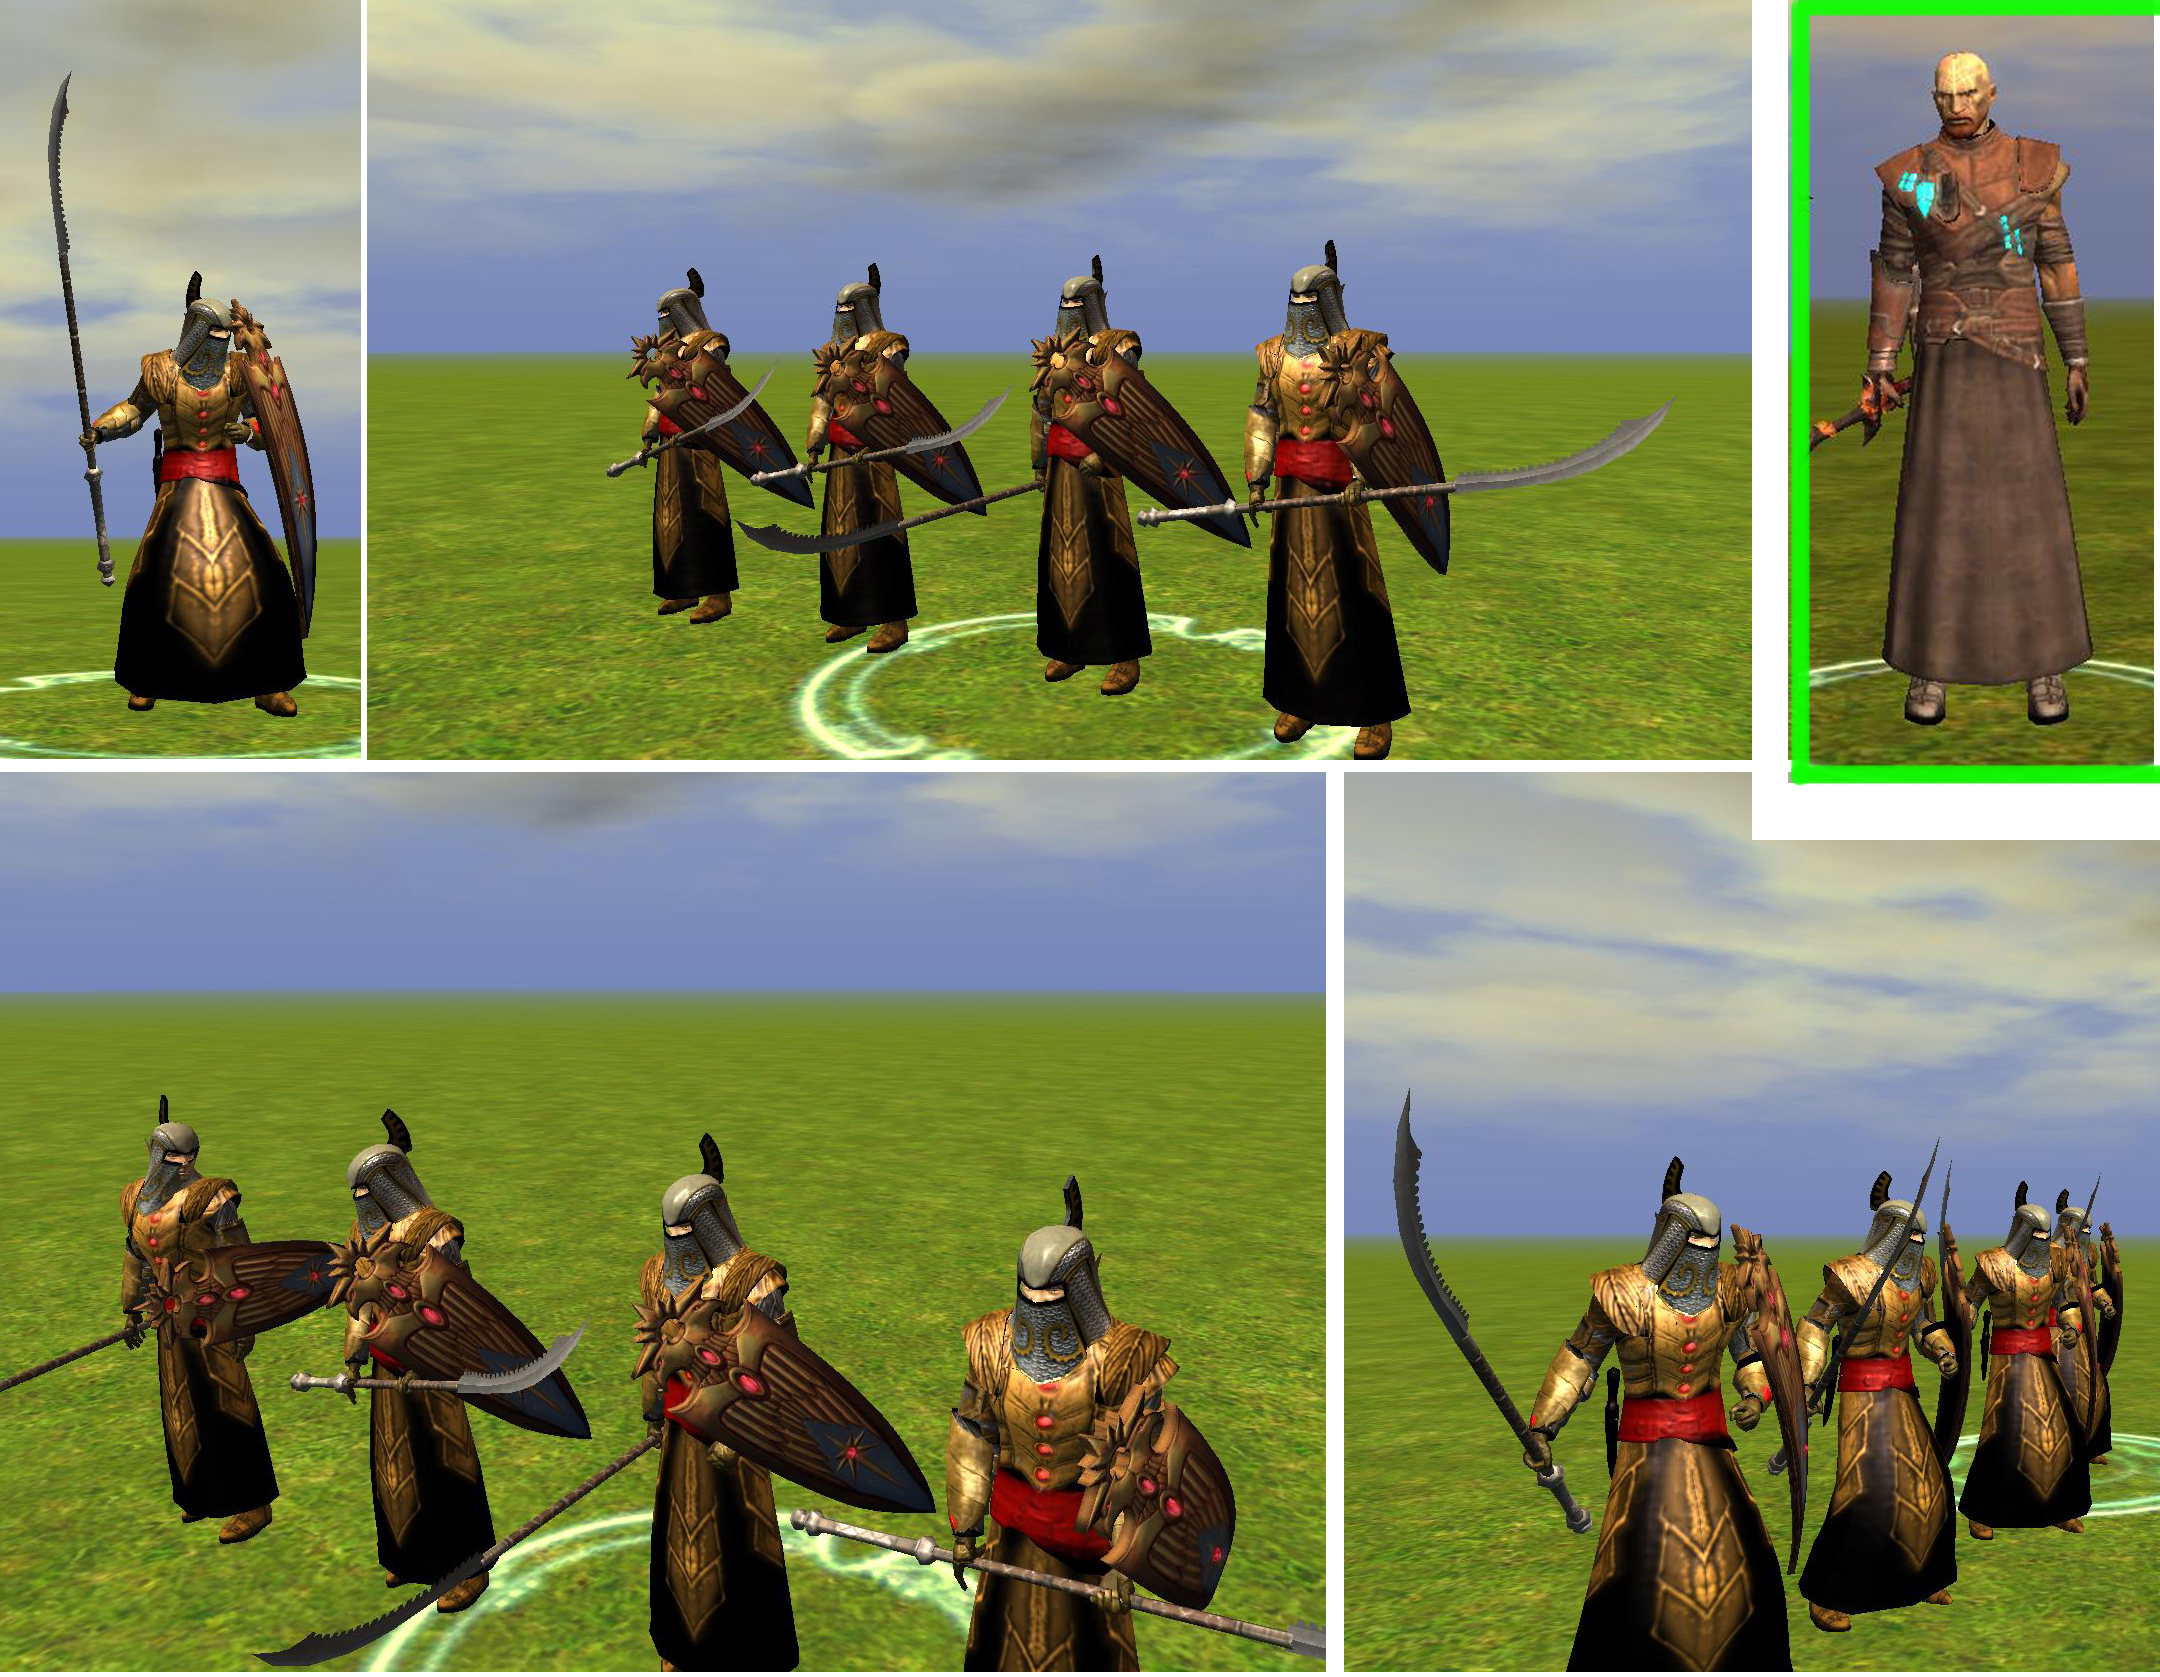
The final quality of the armor is not the greatest, but I’m using it as an example more for how you can completely transform what a base model is merely by repainting it. In this case, I took the warlock leathers of Ammon Jerro from the original game. This one was picked in particular for its shape, and how it was (at the time) the closest match for what I ultimately wanted to make.
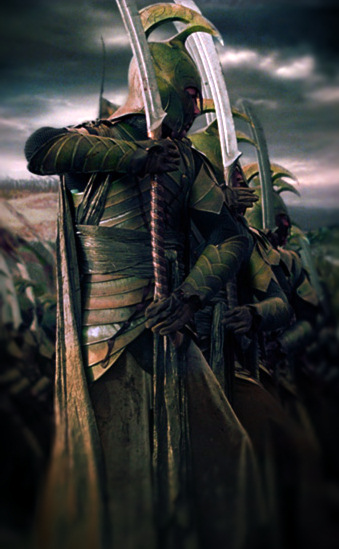
The original inspiration was (perhaps to no ones surprise) the elven warriors from the Lord of the Rings films. At the same time, I wanted a few more high-magic influences, as I was specifically going to build this for a (now defunct) Forgotten Realms server.
What followed was a brief period of concept scribbles, ultimately culminating in the ‘final’ design.
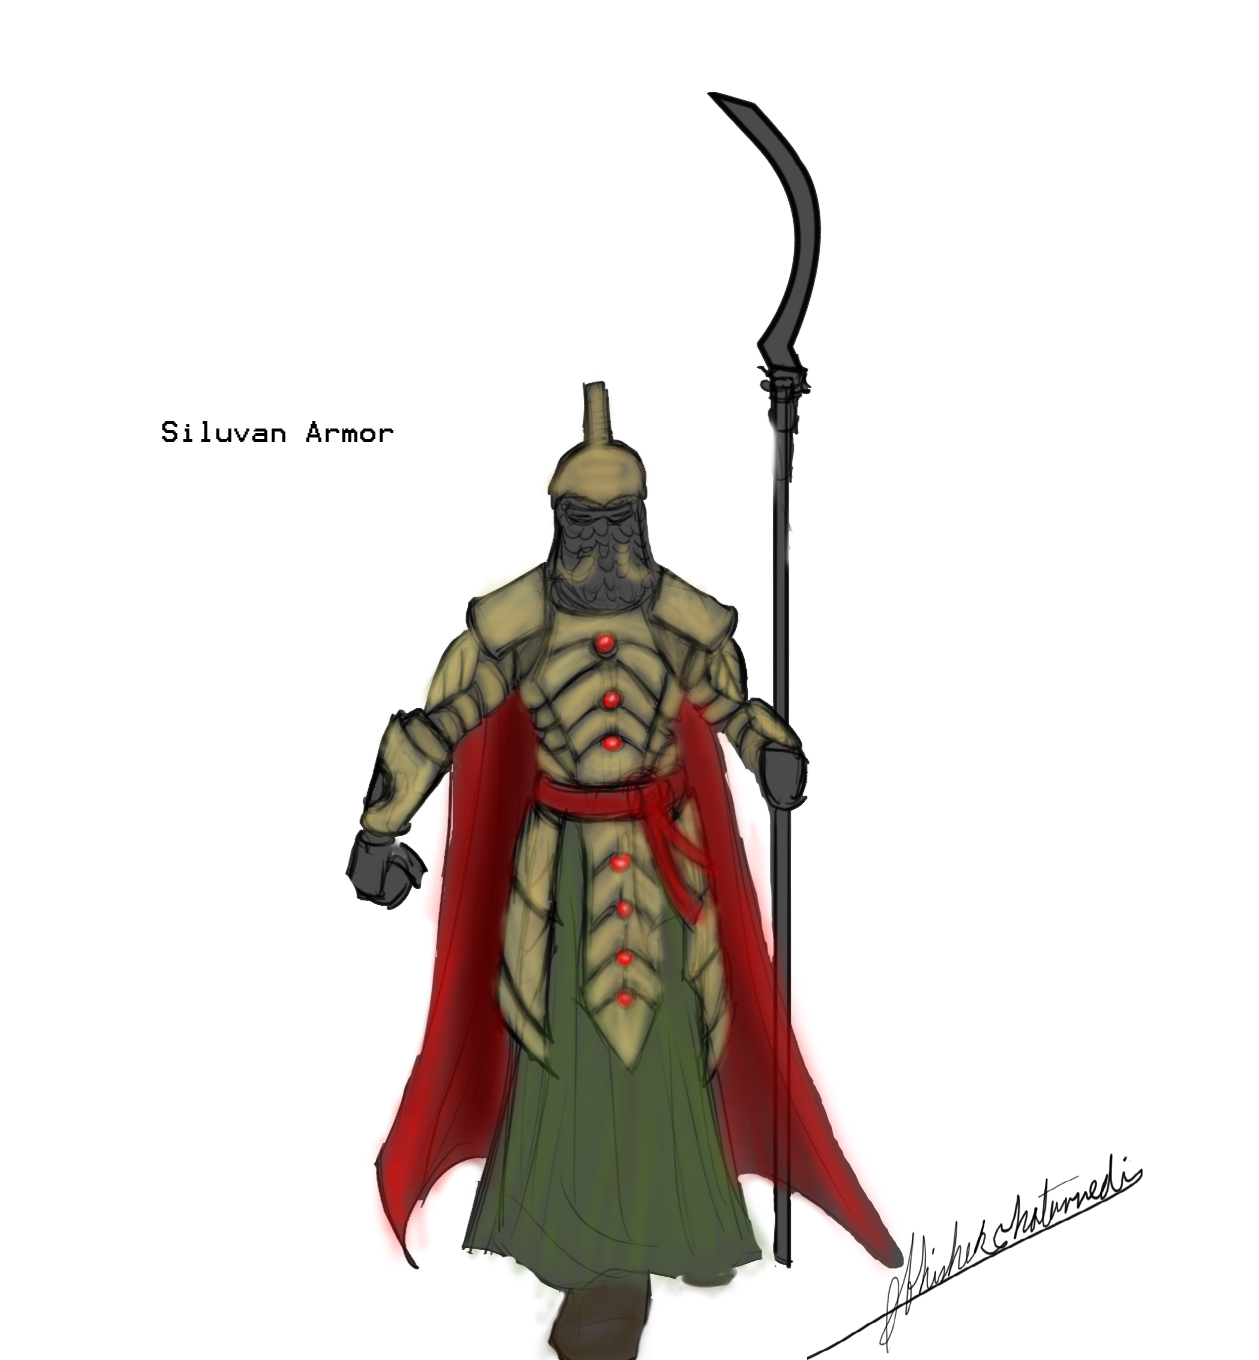
During this phase, it’s advisable to keep the following things in mind:
- The shape of the mesh that you will have to work with. If you’re making the mesh yourself, this may be less of a concern. However, if you’re working with an existing body, try to keep its shape in mind, as well as what accessories will be used to compliment the final design.
- It’s a good idea to plan around how the model itself behaves during animation. One of the problems with the finished elven armor is that the armored scapular (the armor hanging down the middle) is drawn over vertices that move away from each other. This has resulted in awkward stretching and distortions.
Stay tuned for more!
Next post, I’ll go into the start of actually working on the texture sets, as well as how to go about extracting the necessary mesh and image files.
Be First to Comment